With any networked based system, the starting point should always be to verify that the devices are accessible and the IP addresses are correct.
My test 8652 has the IP of 192.169.6.166 this can be verified via the web interface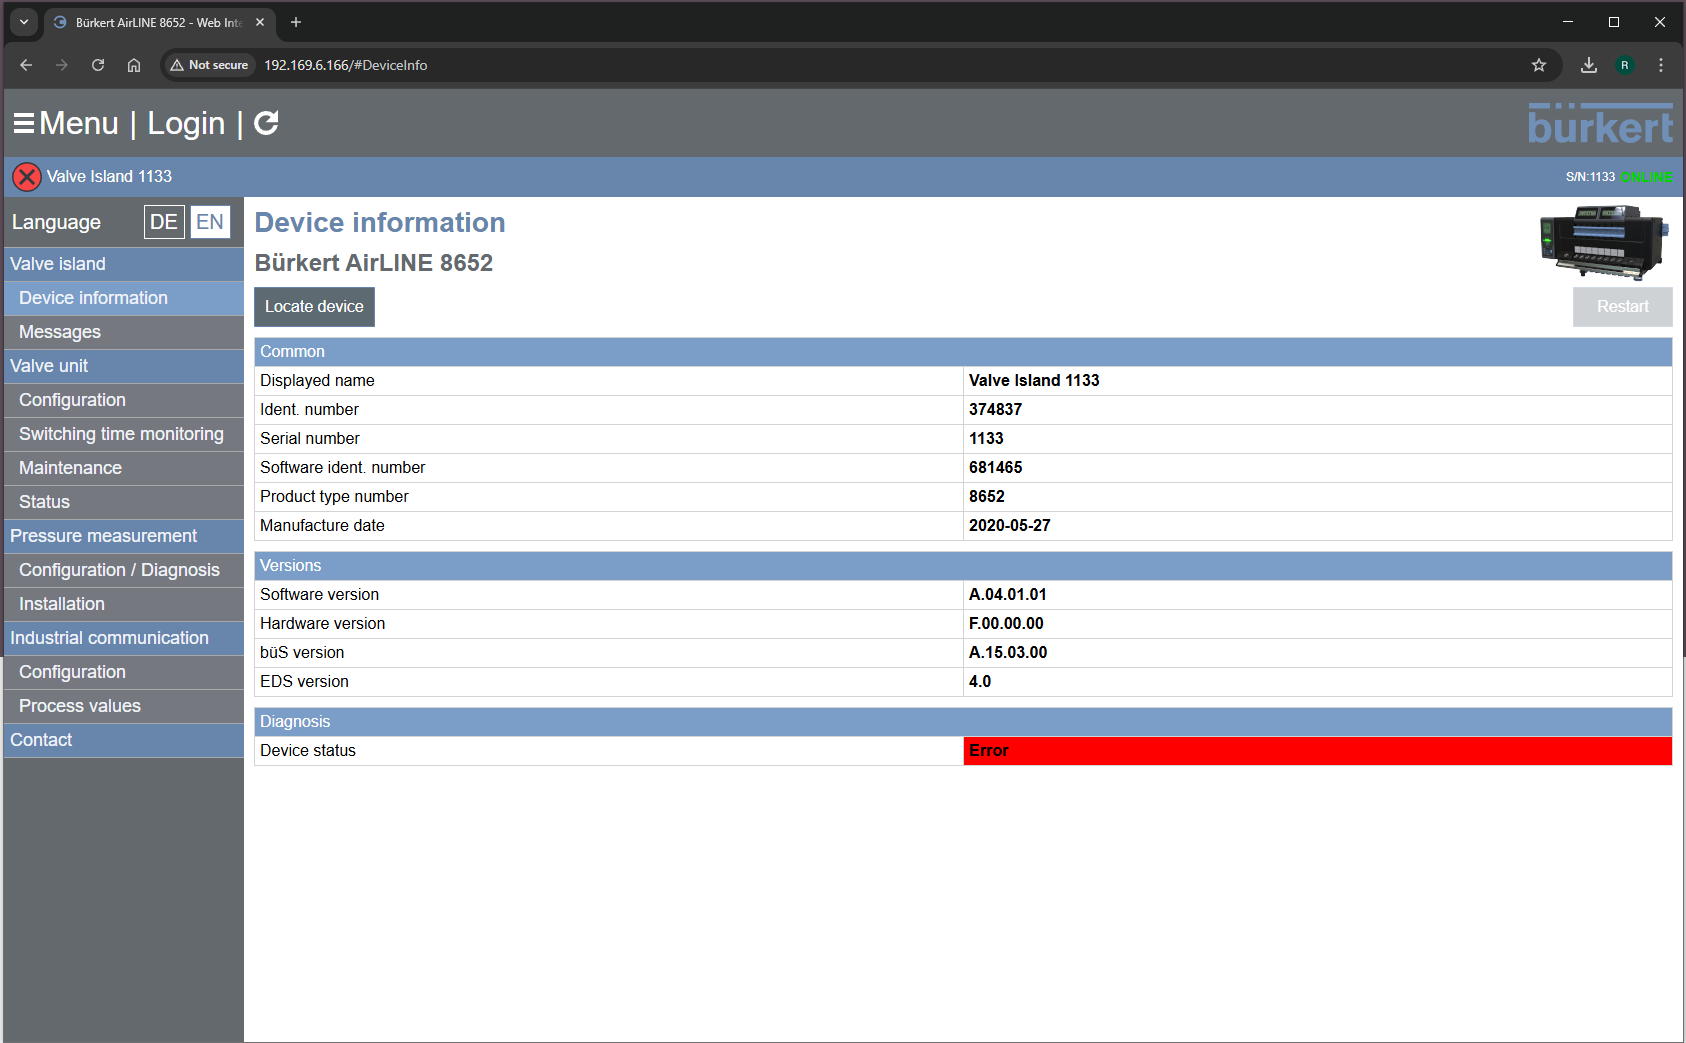
By viewing 'Configuration' under 'Valve unit' we can see the number of valve control units installed. this will be needed when configuring the AOP.
Our Demo 8652 has 2 valve units.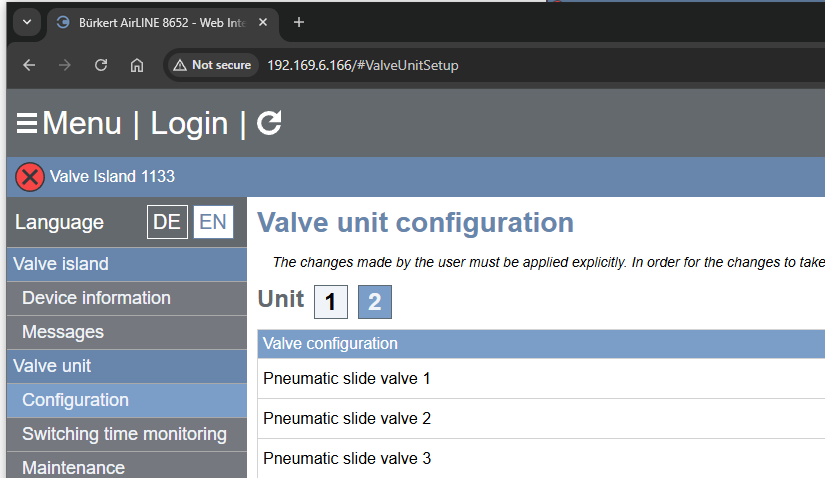
Likewise my PLC has an IP of 192.169.6.10 again this can be verified via the web interface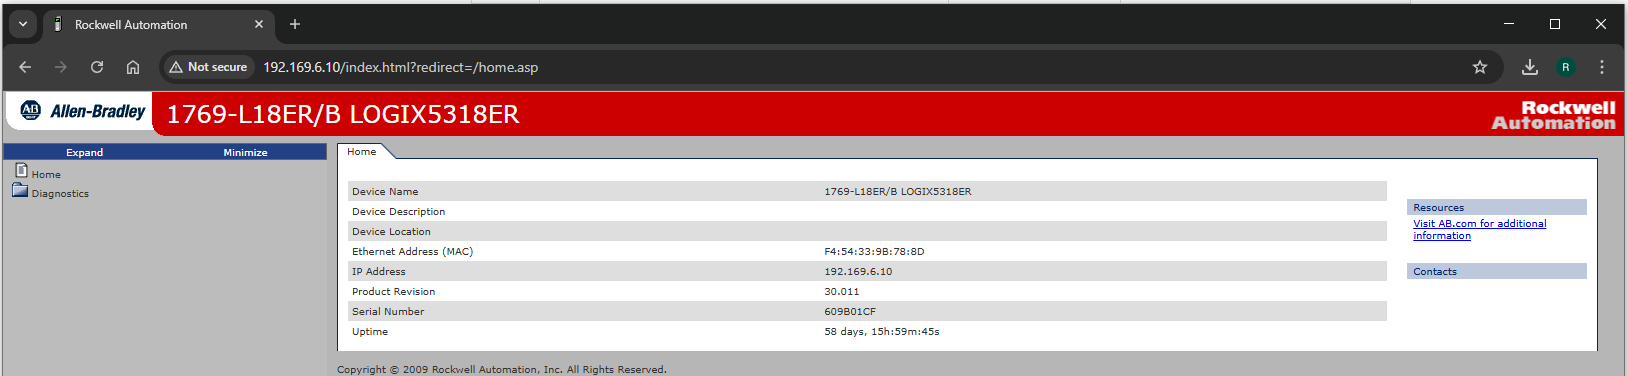
Stage:2
Download AOP, With RsLogix closed install the AOP.
Download the EDS and install into the Library.
From the RsLogix project we need to add a new module 'AirLINE_8652' should be listed.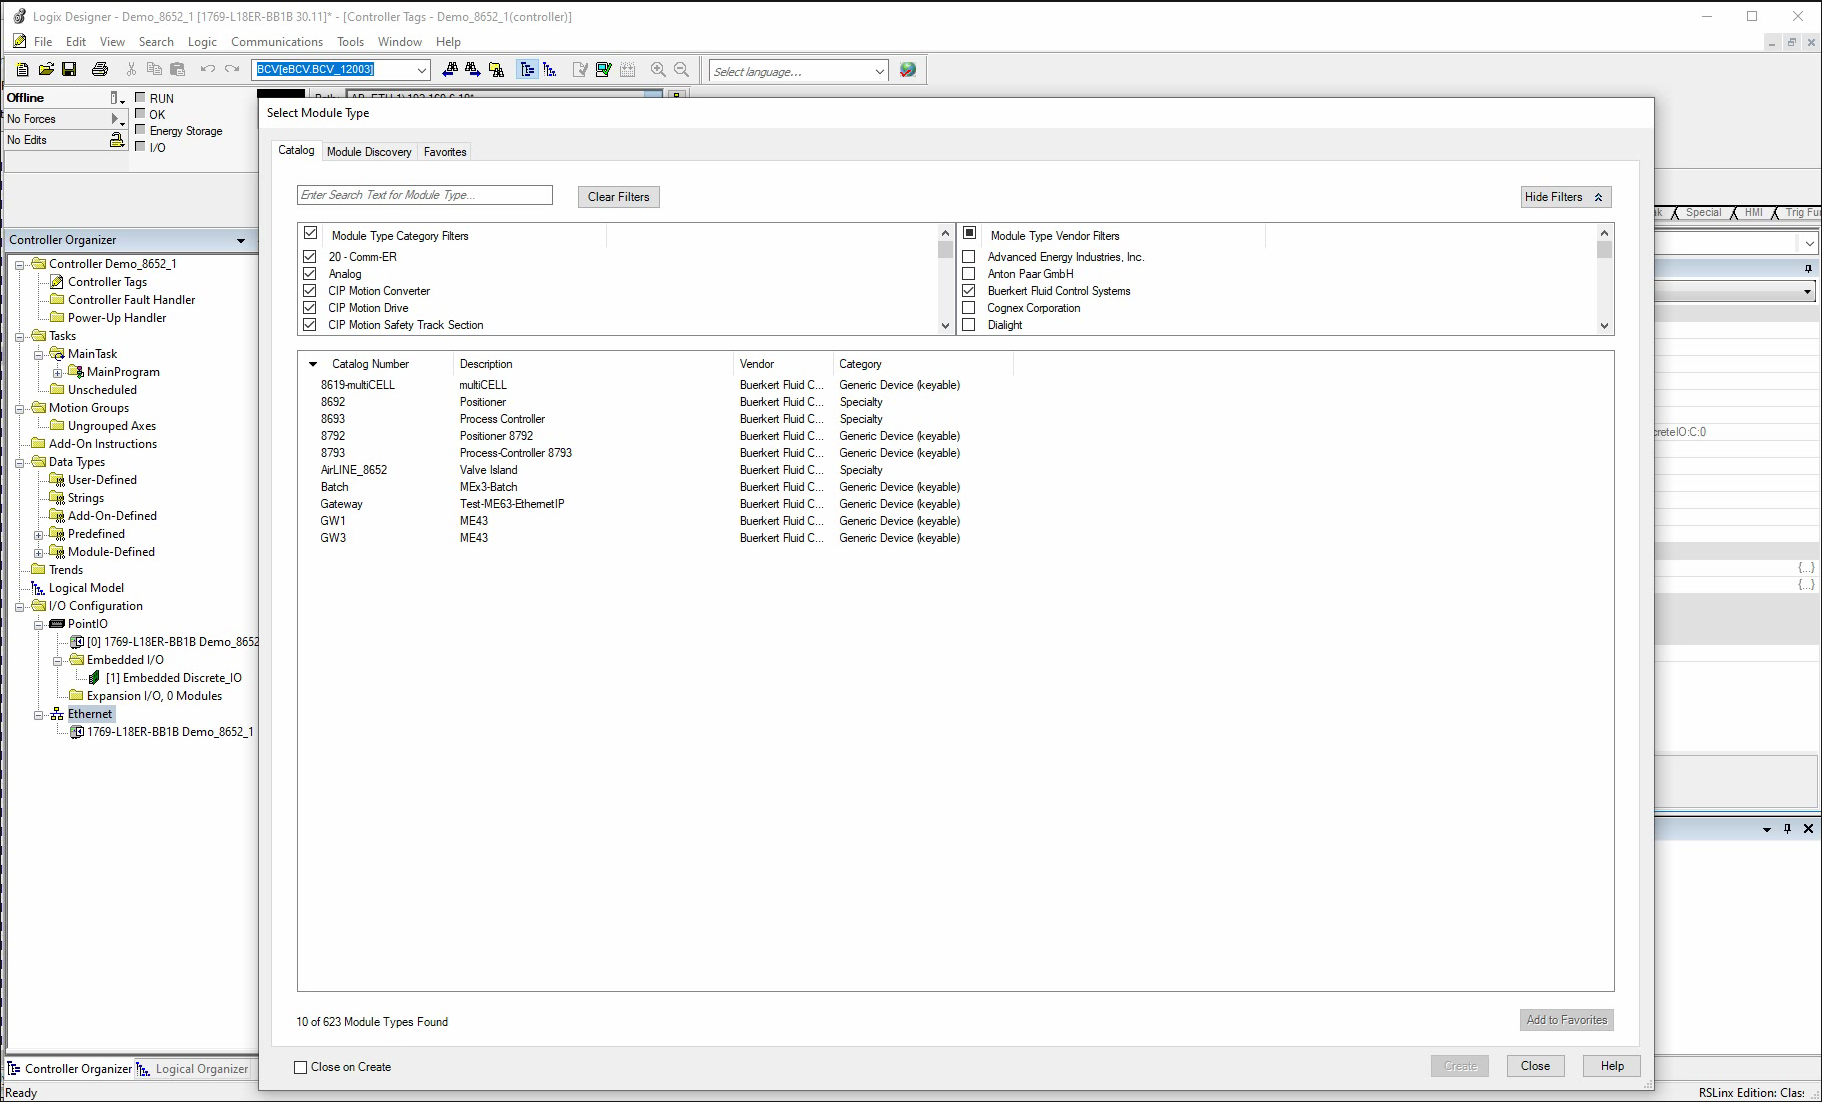
* IMPORTANT *
Change 'Value Unit Count' to match the manifold before proceeding any further.
Configure the module base settings.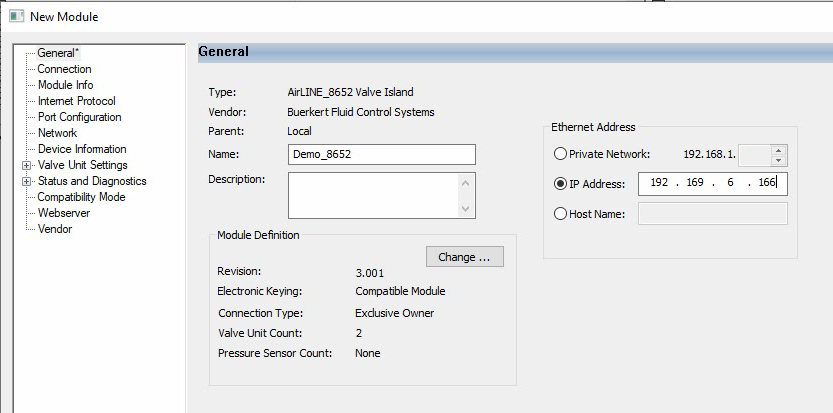
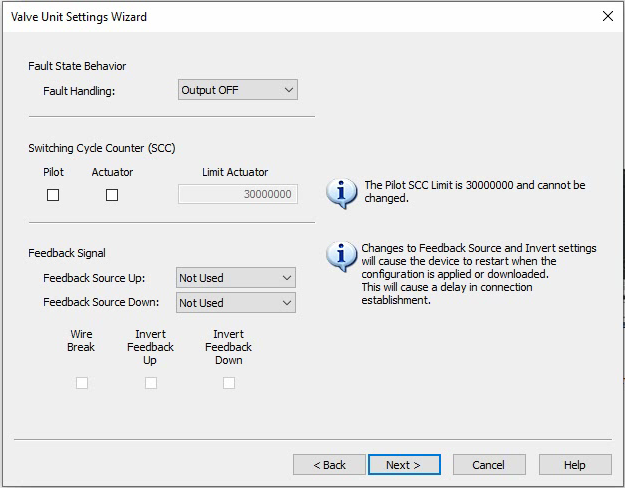
Configure Valve unit settings.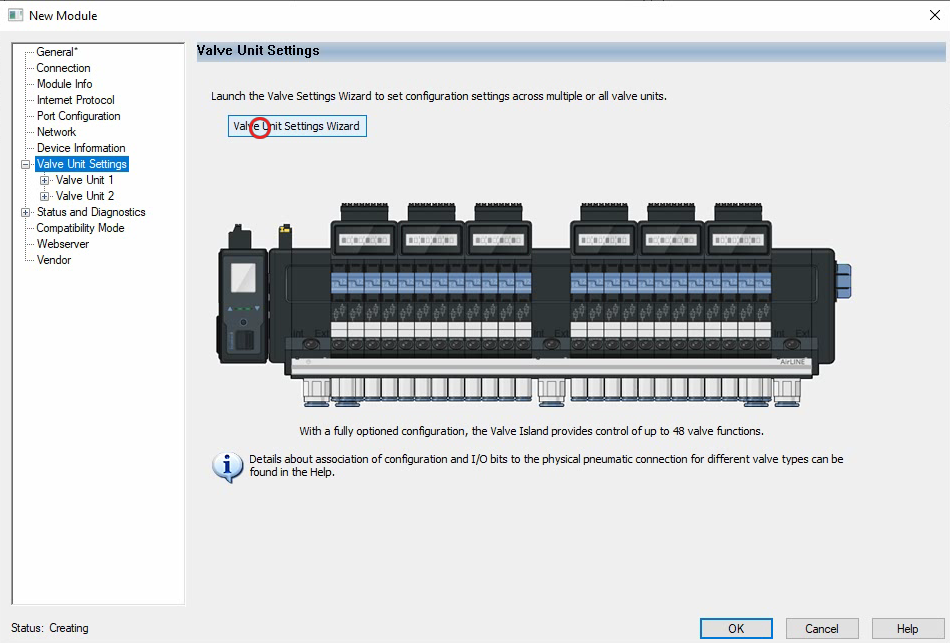
Stage:3
Verify Tag Creation.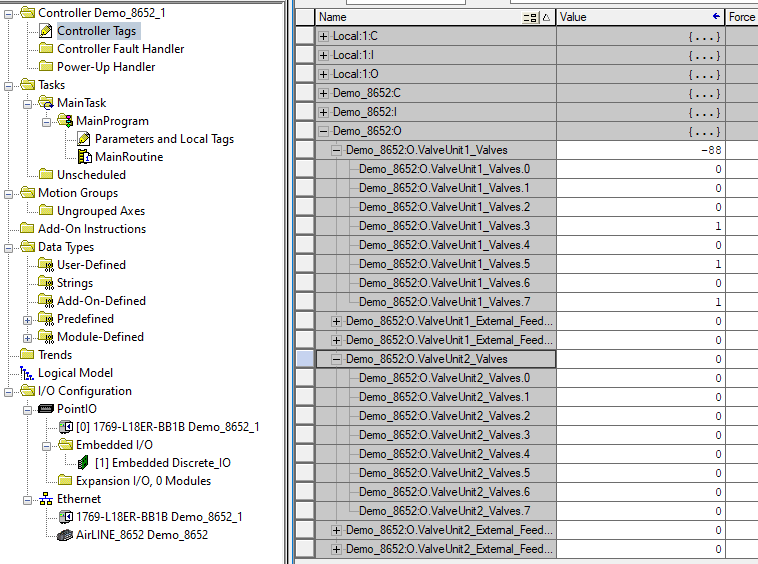
We can see that we now have output tags for Demo_8652 ValveUnit1 & 2.
All we need now is some test code to write into _Valves.x
From the 8652's web page, 'Valve unit'-Status we can actually the monitor the status of each valve installed in each unit.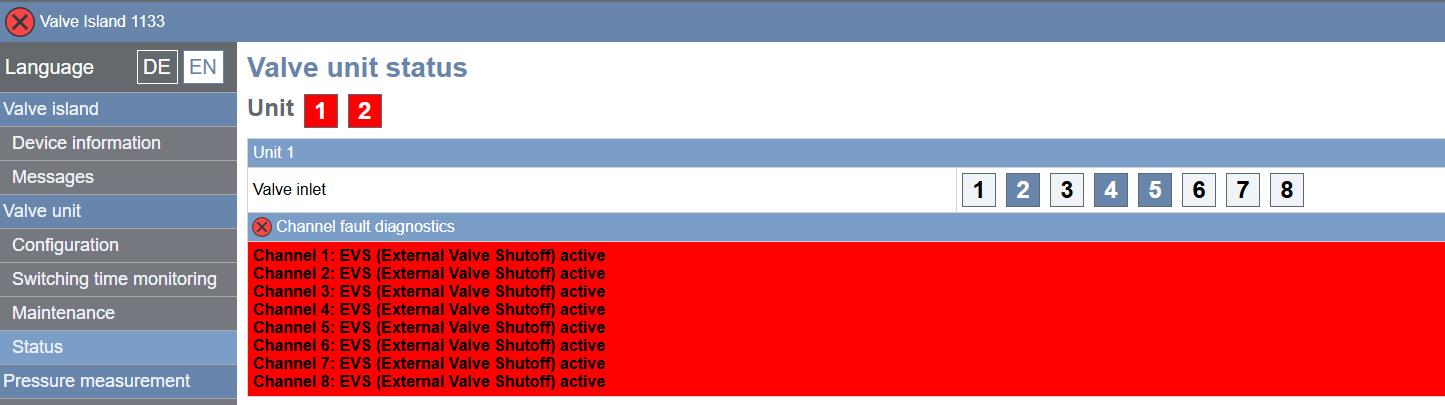
Our test 8652 currently has the external valve shutoff activated hence the alarm.
It does show the PLC is requesting activation on Unit:1 Valves 2,4 & 5.
Screen Grab Video
We often record our screen whilst performing configuration tests.